|
Into the Heart of the Revo
Taken apart by Ruey Loon
This is suprisingly simple.
Here's a guide to get to the heart of the Revo - the motherboard. But take care, opening it up will invalidate your warrenty.
This was suppose to be a guide to take apart the whole REVO, but I realised that the other parts are not as interesting and it is hard to explain some of the procedures. Sooooo.... I'll introduce the easy part first while I figure out how to present the rest of the procedures.
Step 1 Removing the Keyboard
You can remove the keyboard safely without destroying it. The keyboard is held on to the motherboard using a kind of 'sticky film' if you remove it properly, there should be no problem to stick it back.
I have removed my keyboard over 5 times and it still sticks back to the motherboard properly. You start prying the keyboard (use a small flat head screw driver) from the top left hand corner, you can see from the photo that there's actually a notch to help in the removal. This step is easy, 1, 2, 3 and it is off !
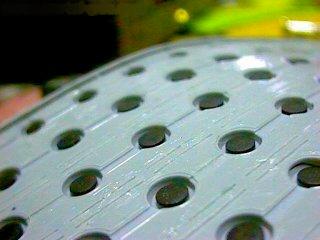
Here's a picture showing the 'sticky film' used to hold the keyboard in place
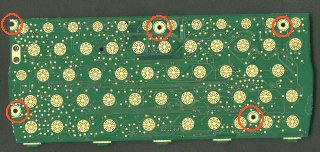
Step 2 Removing the screws
Locate the 5 screws, unscrew them, and the motherboard is half way to freedom
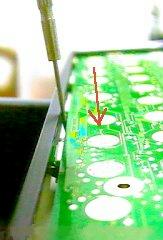
Step 3 Unhooking the motherboard
After removing the screws, the motherboard is free to move - a bit. There are some 'teeth' at the edge of the motherboard that hold it in place. Now, use a small screw driver, stick it in between the casing, push the motherboard toward the screen (the motherboard is very loose, so this part should be easy), then lift it up.
Step 4 The Motherboard
Alright, you should be able to see the whole mother board now, but take care, if you look at the bottom, you'll see that that are 2 flexicables connected to the motherboard DO NOT DAMAGE THEM !!
A tour of the motherboard
1) The NEC WINDEMERE Processor Chip (ARM 7TDI
2) KM416V4104[ABC]S-L6 - Samsung
3) Processor Clock Crystal 3.686Mhz, it is multiplied by 20 then divided by 2 to get 36.68Mhz The Series 5 uses the same Clock Crystal, but it is multiplied by a different factor to get 18.432Mhz
4) Bus Clock Crystal 32.768Mhz
5) Flash ROM - which are reprogrammable, but these are replaced by Mask ROM later on in the production to reduce cost. Hence, I believe it is possible for these REVOs to be reprogrammed to the New Revo-Plus
6) Micro switch (for turning on your Revo when you open the case)
7) ZIF socket for LCD flexi-cable
8) ZIF socket for the flexi-cable from the infrared and power supply module

(1) opening keybord
|
(2) open keybord
|
(3) inside keybord
|
(4) extract pcb
|
 
(5) p c b ( REVO )
|
|
|
|
|
|
|
|
|
|
|
|
|
|
|
|
|
|
|
|
|
|
|
|
|
|
|
|
|
|
|
|
|
|
|
|
|
|
|