|
Changing zif cable
Dismantaling the Revo's Battery Compartment - inside Revo Part II
Ripped apart by Ruey Loon
This is a guide is to completely remove the battery compartment on the Revo, it is something like part 2 of the Revo's Motherboard guide.
This article takes off from where the previous article ends. Actually you do not need to remove the motherboard to remove the battery compartment, I'm showing it here for continuity.
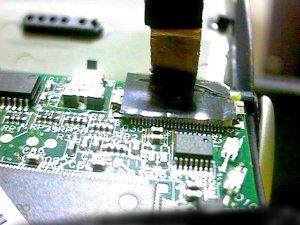
Step 1 The previous guide ended after the motherboard is exposed. To remove it completely, you need to remove the 2 flexicable attached to it. One is from the Charging/InfraRed module and the other is from the screen module.
The flexicables are connected to the motherboard using a ZIF socket (ZIF = Zero Insertion Force). The sockets are marked 7 and 8 in the Revo's Motherboard guide.
First remove the black tape.
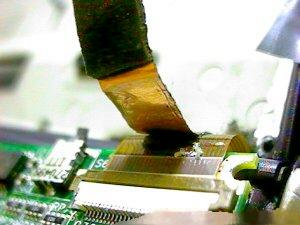
Step 2 This is what you will see after removing the black tape.
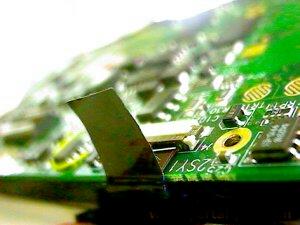
Step 3 "Unlock" the socket by lifting up the brown part.
The part is quite fragile so do not use too much strength.
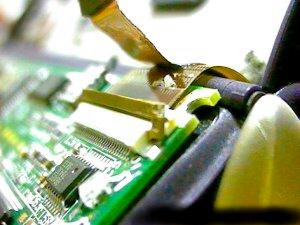
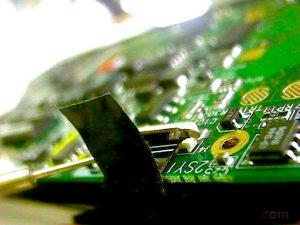
Step 4 The flexicable can now be removed from the socket.
Step 5 Now do the same to the other socket.
Step 6 "Unlock" the socket.
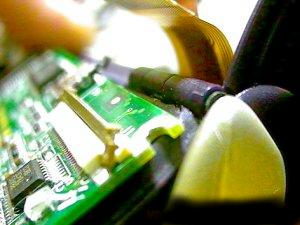
Step 7 Gently remove the flexicable.
Step 8 After both flexicables are removed, the motherboard can be removed from the casing.
This is how a Revo looks like without its motherboard. Now we are ready to remove the battery compartment.
Step 9 The first 'screw' is not a screw at all, remove the Revo Badge and this is what you will see. The Revo Badge is made of a malleable metal and it will certainly deform if you remove it.
You can bend it back to shape but it would not be pretty anymore :p The red arrow points to the locking pin, there are 2 on each side. Slide it to the center to remove it.
Step 10 The top cover will not just flip open, there is still catch.
The trick to 'uncatch' it is to open up the Revo and then close it, it will be uncatched automatically. Excited now ? :) Lets take a peek.
Step 11 Here we can see the battery and the molex plug connecting the battery to the Revo.
The battery is held in place by a piece of black tape, if you unplug the molex plug and remove the black tape it is very easy to remove the battery.
But again remember, not too much strength ok !
Step 12 It is not that easy to remove the top cover. First you will need a tweezers with a long reach, to reach inside and 'uncatch' the spring. This spring is what makes the Revo snap open and snap shut. There is one on each side. (It is much easier to remove it from the top cover, where one of the red arrows is pointing at).
The other red arrow is pointing at the hinge, inside the hinge, there is a piece of metal holding the top and bottom covers together.
The piece of metal looks like the one beneath the Revo's Badge (it is "L" shaped). To remove it, you need to slide it towards the center.
It is too dark in the photo but the part you would look for is inside the red circle.
There are two of these metal pins on each side of the cover, but only the one on the left can be removed. After you removed the one on the left, you have to just maneuver the top cover until it comes off. It is possible to fit the top cover back without the two metal pins, I am using my Revo this way now.
Step 13 This is what the Revo looks like after removing the top cover. Note the groove that the front part of the Revo runs on to slide in and out.
Step 14 Top view with the front back moved back completely. Note that there is no space at all ! The little space is just enough for the battery. Unscrew the Charging/Infrared module from the bottom casing.
Step 15 Remove the bottom casing by gently pulling it away sideways, until it 'uncatches'. The part that catches the bottom casing is shown in this photo.
Step 16 Top view of what the Revo looks like without the back compartment. Tadaa !! That's all Folks
Heading2
Description here
|
Heading3
Description here
|
Heading4
Description here
|
|
Heading5
Description here
|
Heading6
Description here
|
Heading7

Description here
|
|
Heading8
Description here
|
|